Instructions: Brighter dipped headlight for the Fiat 500 classic car - conversion/installation of relay

Description:
In the standard version, the current for the dipped headlight flows via the steering column switch (using various plug-and-socket-connectors, contacts, etc.). This detour via the steering column switch has the effect that energy that could make the headlights shine brighter is lost.
By installing a relay, you can avoid this (lossy) detour.
Benefit:
More current will reach the headlights, which makes them shine brighter, and only the part of the current that is needed for switching the relay will flow through the steering column switch.
Material:
To improve the performance of the dipped headlight, ONE relay (for both sides) is needed. 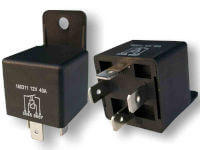
Additional incidentals required:
- 4 x female quick disconnects

- 1 x double plug (Y-plug, distributor)

- 2 x cables
- 1 x plug or similar for connecting the cable to the car body

Installation instructions (for the relay):
- Locate the cable that goes from the fuse box to the steering column switch.
Fiat 500 F: grey cable, from fuse (3/4 – these are connected to each other) to the steering column switch (56b)
Fiat 500 L/R: grey-red cable, from fuse (3/4 – these are connected to each other) to the steering column switch (56b)
-> Our service: Wiring diagrams for the Fiats 500, 126 & 600 are available in PDF format for download and/or printing (clicking the link opens a new page / tab) - Cut this cable (at a suitable position).
- Connect the end of the cut cable going to the steering column switch to relay terminal (85).
- Connect the other end of the cable going to the fuse box to relay terminal (87).
- Ground connection -1: Connect a new cable to relay terminal (86).
- Ground connection -2: Connect the second end of the new cable to the car body.
- 12V power supply -1: Connect a new (red) cable to relay terminal (30).
- 12V power supply -2: Connect the second end of the new (red) cable to fuse (1):
- Two red cables are connected to the side marked “A”.
- Disconnect one of the two cables and reconnect the two red cables using a double plug (Y-plug).
Congratulations! You are done! :-)
Summary in tabular form (check list):
Relay (dipped headlight)
-- 85 -> Steering column switch, grey(/red)
-- 87 -> Fuse box, grey(/red) (3rd and 4th fuse)
-- 86 -> Ground
-- 30 -> Fuse box, red (1st fuse)

